
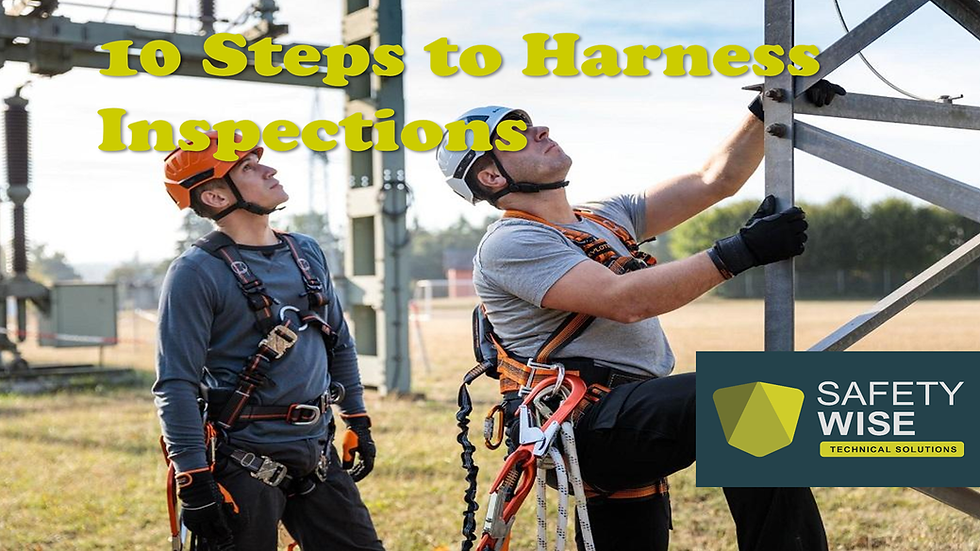
10 Steps to Harness Inspections
- Luke Dam
- Jun 4, 2025
- 4 min read
Fall protection equipment, such as harnesses, is only effective when it is properly maintained, used, and inspected. A damaged or compromised harness can turn a lifesaving device into a serious liability. That's why regular, thorough harness inspections are not optional—they're essential. In this article, we break down the 10 critical steps for conducting harness inspections that keep your team safe and compliant.
Step 1: Know the Standards and Manufacturer Guidelines
Before touching a harness, make sure you're familiar with the applicable regulations and manufacturer recommendations. In Australia, AS/NZS 1891.4 outlines the inspection and maintenance requirements for fall arrest systems. Similarly, other regions follow standards such as OSHA (USA), CSA (Canada), or EN standards (Europe). Always cross-reference this with the manufacturer’s instructions—each harness model may have unique materials or design features requiring specific checks.
Key Tip:
Download or print the manual for each type of harness you use and keep it in your inspection area.
Step 2: Establish a Formal Inspection Schedule
Harnesses must be inspected at multiple points:
Before each use (by the user)
Every 6 months (by a competent person)
After any incident or drop (even minor)
Document these intervals clearly. Assign responsibility and maintain a log to track when inspections occur and who performed them.
Key Tip:
Create a colour-coded tagging or labelling system to indicate inspection status (e.g., green for current, yellow for due soon, red for expired).
Step 3: Prepare a Clean, Well-Lit Inspection Area
Inspections should never be rushed or conducted in poor conditions. Choose a clean, dry, well-lit space with enough room to fully extend and examine the harness. Lay down a clean cloth or table to prevent cross-contamination with oils, dust, or chemicals.
Key Tip:
Use a white cloth background—it makes it easier to see frays, corrosion, or dirt embedded in webbing.
Step 4: Start with the Labels and Tagging
Check all labelling for legibility. If the inspection record, serial number, or date of manufacture is missing or unreadable, the harness must be withdrawn from service immediately. This information is critical for verifying inspection dates, model type, and traceability.
What to Look For:
Faded, torn, or missing labels
Illegible serial numbers
Missing inspection records
Step 5: Inspect the Webbing Thoroughly
Webbing is the core component of any harness. Run your hands slowly along every strap—this allows you to detect damage both visually and by feel.
What to Look For:
Cuts, tears, or holes
Fraying or pulled threads
Abrasions or fuzzy spots
Heat or chemical damage (e.g., stiffening, melting, discoloration)
Mold, mildew, or chemical staining
Flex the webbing to expose hidden damage, especially at high-wear areas like edges and buckles.
Step 6: Check All Stitching
Inspect all the stitching for loose threads, broken stitches, or changes in colour (which may indicate UV or chemical damage).
Key Tip:
Pay extra attention to load-bearing stitch points—these are the difference between life and death in a fall.
Step 7: Examine Buckles, D-Rings, and Metal Hardware
Metal components must be free from deformation, cracks, corrosion, and sharp edges.
Checklist:
Check for distortion or bending
Inspect rivets and grommets for wear or looseness
Ensure buckles operate smoothly without sticking or jamming
Look for rust, pitting, or chemical residue
If a buckle jams or a D-ring is bent, the harness should be removed from service.
Step 8: Test for Elasticity and Adjustment
Some harnesses have elastic components or adjustable straps. These should return to their original shape and hold tension when fastened. Adjusters must move freely and lock securely.
What to Do:
Pull all adjustable straps fully out, then retighten
Check if elastic sections rebound properly
Confirm the harness can be correctly fitted to the wearer
If adjusters slip or elastic sections sag permanently, that’s a red flag.
Step 9: Look for Contamination or Improper Cleaning
Oil, paint, glue, and other substances can compromise webbing integrity or indicate misuse. Also check for signs the harness has been cleaned incorrectly—abrasive brushes, solvents, or machine washing can degrade the fibres.
What to Watch:
Stiff or discoloured straps
Sticky residue or embedded foreign objects
Signs of excessive UV exposure (fading or brittleness)
Cleaning Tip:
Always use mild soap and water with a soft brush or cloth. Never use bleach or harsh chemicals.
Step 10: Document the Inspection and Tag the Harness
All inspections must be recorded. Use a consistent checklist and logbook. Record the inspector's name, date, any defects found, and the final decision: Pass, Fail, or Repair Needed. Harnesses that fail must be clearly tagged "DO NOT USE" and quarantined until properly disposed of or repaired (if allowed by the manufacturer).
Best Practice:
Use tamper-proof inspection tags or QR-code systems to track inspection history digitally.
Final Thoughts: Beyond the Checklist
A good inspection is not just about ticking boxes. It’s a mindset of care and responsibility—someone’s life depends on that harness. Encourage all users to treat harnesses as critical safety equipment, not just another item in their kit bag.
Bonus Tips:
Training is essential: Ensure all workers are trained to do pre-use inspections themselves.
Rotate stock: If some harnesses are rarely used, they still need periodic inspection and rotation.
Treat harnesses like PPE, not tools: They should never be modified, loaned without tracking, or stored carelessly.
Conclusion: Safety Starts with Inspection
Conducting proper harness inspections isn’t difficult, but it does require consistency, attention to detail, and the right mindset. By following these 10 steps, you're not just complying with standards—you’re proactively preventing falls and saving lives.
Invest in inspection training, maintain records, and foster a workplace culture where safety is everyone’s responsibility. Because when it comes to working at height, there’s no room for compromise.


Comments